

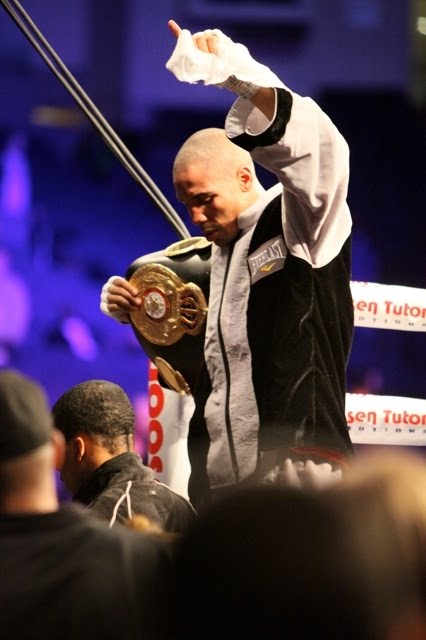
Oakland, CA -- In front of a small, but partisan and enthusiastic crowd, Andre Ward fought an ugly, but effective 12 rounds against Australian Sakio Bika, winning a unanimous decision in the second defense of his 168-pound title at the Oracle Arena in Oakland.
Bika proved a game and competent opponent, but not skilled enough to do any damage to Ward. Ward's usually dazzling speed and counterpunching ability were not on display Saturday night, as referee Dan Stell allowed prolonged clinches, a situation Bika used to his advantage to minimize the damage Ward could do from distance.
Ward did show, however, that he could adapt to a brawling opponent and hold his own. He won the battles on the inside, operating effectively both when he was against the ropes, and when he had Bika pinned there.
Here is how The Daily Sports Herald saw it, round by round:
Round 1
Bika comes out aggressively, establishing that he is not intimidated by Ward, and that he is determined to fight at close range. He lands a good left hook, his only effective punch of the round.
As usual, Ward fights the first round cautiously, pawing with his jab in hopes of maintaining some distance. Ward also lands one good left hook. Ward wins the round by easily avoiding Bika's attacks, and landing a few jabs -- a punch Bika does not employ.
Ward 10, Bika 9

Round 2
Bika continues his brawling ways, and is warned early for throwing an elbow. He uses his jab a bit in this round, landing a good one early. Most of his punches, however, are wild, and Ward avoids them easily.
Ward counterpunches well when Bika misses, and he lands several 2-punch combinations, mixing up the body and head shots. Ward is fighting under control; Bika is wild.
Ward 10, Bika 9
Round 3
Bika comes out brawling again. He lands one left hook, but it is apparent that he will only do damage on the inside, so he looks to hold early in exchanges. When Ward can maintain his preferred range, he lands several left hooks, and a good lead right. His jab is also snappier than in the first 2 rounds.
Ward is somewhat passive during clinches, expecting Stell to separate the fighters while Bika takes advantage of the long clinches to land some questionable punches to the kidneys and ears of Ward.
Ward 10, Bika 9
Round 4
Stell breaks up the clinches more quickly in this round, and the results are impressive for Ward. This is his most effective round; he demonstrates excellent footwork and hand speed, throwing bigger punches than in the first 3 rounds, landing more, and knocking Bika down once, although Stell ruled it a push.

In one exchange against the ropes, Ward slipped a Bika punch, ducked under another to escape, fooled Bika into thinking he was running, turned at short range, and delivered a powerful short straight right.
Ward 10, Bika 9
Round 5
This is perhaps the most entertaining round of the fight, as Ward lives a bit dangerously, trading left hooks with Bika. Both fighters demonstrate good chins, and the crowd seems surprised that neither fighter goes down in this round. Ward is far more effective, landing a whole spectrum of punches, including a straight lead left, a counter left hook, jabs, and the only uppercut of the fight.
Ward 10, Bika 9

Round 6
After the previous round's activity, both fighters take a rest in round 6, slowing considerably. Even this early in the fight, Ward appears to know that he has the fight under control, and that he will win if he does not make the big mistake. While not very effective, Bika does outwork him in this round.
Bika 10, Ward 9
Round 7
The slowed pace continues in round 7, with the style favoring Bika. Bika continues to be wild and Ward avoids most of his punches easily, but is having more trouble finding the counterpunching opportunities he capitalized on in the early rounds. Bika wins the round again by pressing what action there is.
Bika 10, Ward 9
Round 8
Ward is in cruise control at this point. He goes back to the jab, keeping Bika from outscoring him, and wins the round narrowly.
Ward 10, Bika 9
Round 9
Bika comes out more aggressively in round nine, perhaps feeling the fight getting away from him on the scorecards. He again tries to bully Ward, getting his second warning for an elbow. The tactics revitalize Ward, who beats Bika at his own game, trapping Bika against the ropes for a full minute, and punishing him with body shots.
Ward 10, Bika 9
Round 10
The fight is now tipped solidly in Ward's favor. Bika sustains a cut over his eye, and while still cautious, Ward lands a number of effective punches. He again demonstrates a large repertoire of punches, landing jabs, lead rights, and left hooks.
Ward 10, Bika 9

Round 11
Bika impresses by continuing to work. He's game, and while obviously frustrated, never looks overwhelmed. He lands a couple of right hands, but he's wary of the counterpunch, and they lack power. He continues to be wild, but he also demonstrates a good ability to recover after missing and avoid the counterpunch. Ward maintains his lead by being the aggressor late in the round.
Ward 10, Bika 9
Round 12
Bika needs the KO to win, but he still looks to clinch, effectively conceding the fight. Ward is still fast, avoiding any damage in the last round.
Ward 10, Bika 9
DSH Final Scorecard: Ward 118, Bika 110
The ringside judges saw it the same way, two of them scoring it 118-110 for Ward, with the third giving Ward every round (120-108). While this fight was not overly entertaining, it did demonstrate Andre Ward's versatility, and it should make fight fans eager to see Ward get back to the competition of the Super Six Tournament.
By David Granger
Staff Reporter for TheDailySportsHerald.com
Photographs by Marc Ramos
Contributing Photographer for TheDailySportsHerald.com
No comments:
Post a Comment
We encourage all intelligent, passionate comments. Please refrain from any ignorant, racist, or offensive rants.